I wonder if you spotted the two very specifically themed papers I included in my February Counterfeit Kit, "Never Be Seen"?
Can you see them in the bottom right hand corner? Two papers covered in definitions, one for a baby boy and one for a dad.
So the theme of today's pages should come as no surprise! Nothing very special in terms of page construction, but precious in terms of photos and memories!
I love the top photo of Robert, with the clock in the background, which I took minutes after Angus was born. And the look on his face in the bottom photo as he looks at his second-born is also so special (Me - I'm not looking so crash hot!)
This page is almost 100% Counterfeit Kit, with just the addition of a piece of map-patterned tissue paper which actually came with a box of shoes! (Or did I add the cardstock stickers too?)
You've seen the Dad, now here's the baby . . .
As these pages will face each other in the family album, I used some of the same elements again. This time the layer that I added was a piece of muslin.
I had to dig through my old photo boxes to find the negative for this photo, as it's from pre-digital days. The little bits of negative peeking out will be a permanent reminder! (Don't worry, they were just the blank bits of negative from the end of the roll, no precious memories destroyed here!)
I really struggle to scatter buttons on a page that looks good, so I tried a trick that I learnt from MercyTiara on Youtube, which is to splatter some mist underneath where your buttons will sit on the page. I'm not sure how well you can see that in the photos, but I'm pretty happy with how it turned out!
Tuesday, February 19, 2013
Monday, February 18, 2013
February Scrapfriends page
A super-quick post just to show you a page I finished based on this sketch at Scrapfriends this month:
Another lot of photos from my phone from when we were in Canberra last October school holidays:
Pretty much everything except the twine and plain green cardstock is from my Counterfeit Kit. I wanted to add the splash of orang with those pre-cut arrows, but I'd already used the thinner shape in my title block . . . so I ended up layering both shapes!
Thanks for stopping by!
Another lot of photos from my phone from when we were in Canberra last October school holidays:
Pretty much everything except the twine and plain green cardstock is from my Counterfeit Kit. I wanted to add the splash of orang with those pre-cut arrows, but I'd already used the thinner shape in my title block . . . so I ended up layering both shapes!
Thanks for stopping by!
Thursday, February 14, 2013
A very pink layout (and a green one)
First up, I'd like to say a big thank you to everyone who left lovely comments about my sick daughter last week. The good news was, she was only sick for a day, the rest of the family did stay healthy, and I did get my weekend home alone!
I've got two pages to show you today, first up is quite a departure from my February Counterfeit Kit (but don't worry, counterfeiters, the second one is from the kit).
I've combined two challenges for this page . . .
. . . an old favourite - Scrapbook Boutique
. . . one I've long been stalking but never attempted - White With One
Theme: White + Pink + Hearts
But I probably wouldn't have given them a second thought if it wasn't for this gorgeous inspiration from Wilna at Two Peas in a Bucket:
So let's not waste any more time, here's my page:
and some close ups:
I did the ombre painting on the weekend (when the family was away) then left it to dry. I've been working on it in bits and pieces since then so it feels like it's taken nearly a week to finish!.
By contrast, this page for Angus came together in less than an hour, thanks to my Counterfeit Kit:
It's no secret that I tend to keep my boy pages pretty simple. With some stickers, washi, wood veneers and pre-cut arrows, I'm really happy with how this page came out!
Thanks everybody for dropping by!
I've got two pages to show you today, first up is quite a departure from my February Counterfeit Kit (but don't worry, counterfeiters, the second one is from the kit).
I've combined two challenges for this page . . .
. . . an old favourite - Scrapbook Boutique
![]() |
| Theme: "LOVE" |
Theme: White + Pink + Hearts
But I probably wouldn't have given them a second thought if it wasn't for this gorgeous inspiration from Wilna at Two Peas in a Bucket:
So let's not waste any more time, here's my page:
and some close ups:
I did the ombre painting on the weekend (when the family was away) then left it to dry. I've been working on it in bits and pieces since then so it feels like it's taken nearly a week to finish!.
By contrast, this page for Angus came together in less than an hour, thanks to my Counterfeit Kit:
It's no secret that I tend to keep my boy pages pretty simple. With some stickers, washi, wood veneers and pre-cut arrows, I'm really happy with how this page came out!
Thanks everybody for dropping by!
Thursday, February 7, 2013
CKC first page, with a Shimelle sketch
Don't you hate that feeling you get when a member of your family comes down with a stomach bug? I'm not talking about the feeling of having a stomach bug, although that is incredibly unpleasant as well!
I'm talking about that feeling you have as a parent, as you wonder, is this bug going to be a 24-hour thing, or is it going to stretch out for days? Is only one going to come down sick, or are we all going to get it, one by one like a pack of dominoes? And you can't help but look ahead at the family's schedule, and wonder what plans might you have to change.
In my case, it is Thursday lunchtime and Maddy's home, having vomited this morning. She's just headed back to bed with a sizzling temperature. What's supposed to happen, is that Rob will take all the three children away for his nephew's engagement party, tomorrow afternoon, while I enjoy a blissful weekend at home. But what's going to happen now? Will she or one of the boys be too sick to go? Will I be too sick to enjoy my weekend of freedom? Or will someone get sick while they're away? Or while they're driving? I'm not sure which would be worst!
So between nursing, disinfecting and praying that none of the above happen, I managed to finish a page I've been working on.
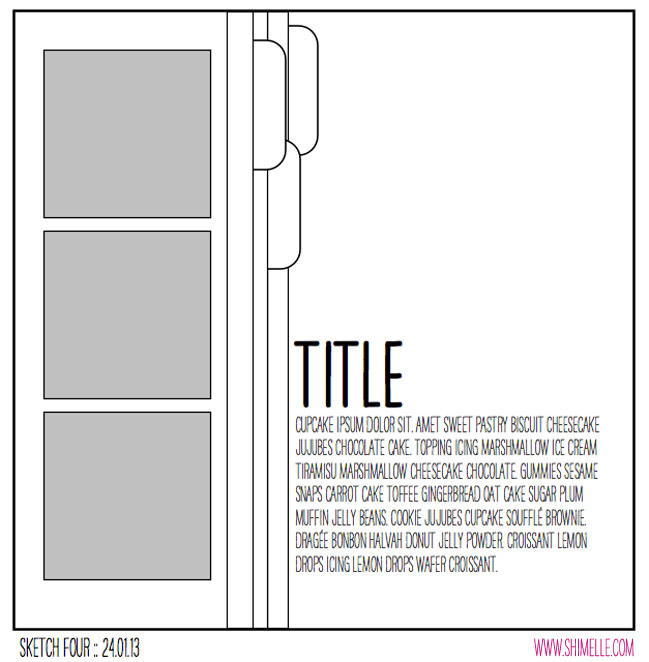
It's the first page I've made with my February Counterfeit Kit, and is based on this sketch by Shimelle:
As soon as I saw this sketch, I thought, "branding strips!". If I can't use this type of sketch to use up some of those narrow strips of paper in my stash, I may as well chuck the lot of them!
Now, it's nothing unusual for me to add product to my pages that's not from my kit, and this time that includes cardstock, brads and . . . something I forgot to put in initially, balsa wood!
I asked Rob to buy me a sheet last time he went to the hardware shop, and I'm ecstatic about how easily it cut in my Sizzix. I used balsa for the title letters and asterix embellishments. I just rubbed a stamp pad over the pieces to colour them.
Monday, February 4, 2013
February Counterfeit Kit
Hello and welcome, fellow counterfeiters. (And if you don't know what the Counterfeit Kit Challenge is, why don't you pop on over and find out!)
As a mother of two boys, I am so excited about the colours in this month's inspiration kit:
It's called "Chasing Pavements" from a site called Scraptastic.
There was a period there, when there didn't seem to be any blue or green in the scrapbooking shops at all, and what was there tended towards the floral and girly.
In fact, before I show you my kit this month, I have to digress and tell you about the Christmas present Maddy (my 9 year old) gave me this last Christmas. She wanted to buy me craft supplies, but her Dad had run out of time to take her shopping. So we decided I would take her to the shop, brief the owner, and go for a walk down the street for five minutes. On the way over, I suggested that anything blue or green but not too girly would be a good choice. In the end, Kylie, the owner, brewed me a coffee and sent me out the back with a magazine. Then, when the secret shopping was finished, she showed us the Kaisercraft new releases for the next couple of months.
And yes, they came through with the goods, choosing the Echo Park "For the Record 2: Documented" paper pack and matching layered chipboard stickers. Thanks Maddy and thanks Kylie!
And that's not the only newish product in my stash. So you'll be seeing a lot more recent product in my kits over the next few months.
Ok, enough waffle! In honour of an old saying my mother used to quote
"blue and green should never be seen,
without a colour in between"
I've named this month's kit, "Never Be Seen".
Let's take a closer look, starting with the papers:
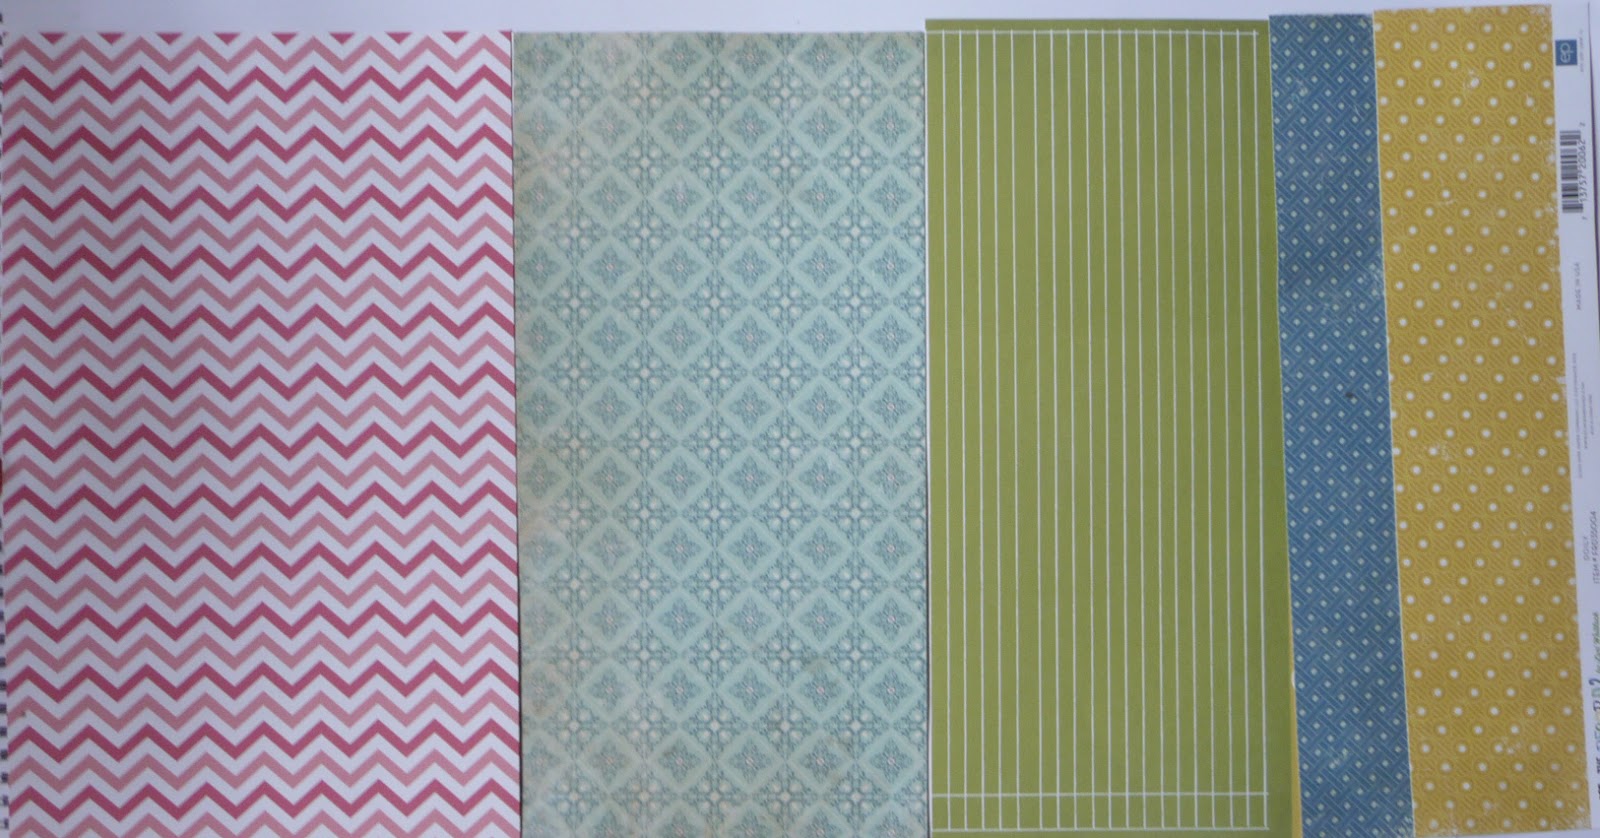
Top Row: we've got 5 sheets of Echo Park, starting with 2 sheets from "For the Record 2: Documented", one from "For the Record 2: Tailored and one from Everyday Eclectic. Next up 2 sheets from Pink Paislee "Portfolio" and lastly Basic Grey "Out of Print".
Bottom Row: Studio Calico - 2 sheets each from Take Note and Classic Calico. Then we've got 4 sheets of much older paper to finish off.
Let's take a peek at the back sides now:
. . . I've also stamped a whole bunch of labels . . .
As a mother of two boys, I am so excited about the colours in this month's inspiration kit:
It's called "Chasing Pavements" from a site called Scraptastic.
There was a period there, when there didn't seem to be any blue or green in the scrapbooking shops at all, and what was there tended towards the floral and girly.
In fact, before I show you my kit this month, I have to digress and tell you about the Christmas present Maddy (my 9 year old) gave me this last Christmas. She wanted to buy me craft supplies, but her Dad had run out of time to take her shopping. So we decided I would take her to the shop, brief the owner, and go for a walk down the street for five minutes. On the way over, I suggested that anything blue or green but not too girly would be a good choice. In the end, Kylie, the owner, brewed me a coffee and sent me out the back with a magazine. Then, when the secret shopping was finished, she showed us the Kaisercraft new releases for the next couple of months.
And yes, they came through with the goods, choosing the Echo Park "For the Record 2: Documented" paper pack and matching layered chipboard stickers. Thanks Maddy and thanks Kylie!
And that's not the only newish product in my stash. So you'll be seeing a lot more recent product in my kits over the next few months.
Ok, enough waffle! In honour of an old saying my mother used to quote
"blue and green should never be seen,
without a colour in between"
I've named this month's kit, "Never Be Seen".
Top Row: we've got 5 sheets of Echo Park, starting with 2 sheets from "For the Record 2: Documented", one from "For the Record 2: Tailored and one from Everyday Eclectic. Next up 2 sheets from Pink Paislee "Portfolio" and lastly Basic Grey "Out of Print".
Bottom Row: Studio Calico - 2 sheets each from Take Note and Classic Calico. Then we've got 4 sheets of much older paper to finish off.
Let's take a peek at the back sides now:
Most of the B-sides are on the neutral to boyish end of the spectrum as well, but that's OK - I've got plenty of "boyish" photos I can scrap!
I don't a lot in my off-cuts that match this month's kit, but I pulled out a bunch of thin strips. Let's see how many I manage to use!
Alphas and stickers next:
You'll see sticker sheets there from For the Record 2: Documented and Everyday Eclectic and some Heidi Swap iron-on letters.
OK, embellishment time!
We've got buttons and wood veneers, frames, tabs and ephemera from Pink Paislee, and of course some washi tape. But because this is the Counterfeit Kit Challenge . . .
. . . I've also stamped a whole bunch of labels . . .
. . . and cut some fun shapes, including lots of different arrows and some chevron borders.
Well, that's my kit. I can't wait to start using it! Are you going to be counterfeiting this month? I hope you have as much fun as I think I'm going to . . .
Sunday, February 3, 2013
January Counterfeit Kit Wrap-up - and the final verdict on those scrap cardstock backgrounds.
As you might or might not recall, I constructed my January Counterfeit Kit pretty quickly, on the grounds that it was school holidays and I knew I wouldn't have a lot of time to use it. Here's the last two pages I managed to put together with it since school's gone back:
This "bookweek" page is made using the last (and possibly most intimidating) of my scrap cardstock backgrounds. To be honest, when I first made them, I wasn't sure how successful they were. Not that I didn't like them, but I'm always a bit nervous making something without an end result in mind. What if I never use it and it just sits in my stash for all eternity? But I've used all five and am happy to say I might repeat the process again. I love how you can make what is really quite a simple page and it looks like that much more effort has been put in!
Ah, Hamish, what a beautiful puppy you were! Not that he's not still a beautiful dog, now, of course! But that soft, fluffy, puppy coat! This is one of my favourite all time photos of him and I think I've managed to do it justice on this page.
All the papers and wood veneers on this page were from the kit. I've added some clusters of goodies from Pink Paislee I won from Jennifer's Jumbles last year (Hi Jennifer!).
Lastly I added some ribbon, and some of my first attempt at a DIY-washi-style tape. I hope to perfect the technique and I'll share it with you then.
So from a kit that ended up containing 6 sheets of patterned paper, 5 scrap cardstock backgrounds and one sheet of journalling cards I'm left with:
a nice amount of paper left, and most of the journalling cards.
I'm thinking I might keep it all together for a bit longer, as I've another page in the pipeline.
Thanks for stopping by, I hope you'll leave a message to let me know you've been!
P.S. I loved that page of Hamish so much, I've linked this page to the Layout Love Linky at purplemailbox.com, so welcome, if you've found me from there!
This "bookweek" page is made using the last (and possibly most intimidating) of my scrap cardstock backgrounds. To be honest, when I first made them, I wasn't sure how successful they were. Not that I didn't like them, but I'm always a bit nervous making something without an end result in mind. What if I never use it and it just sits in my stash for all eternity? But I've used all five and am happy to say I might repeat the process again. I love how you can make what is really quite a simple page and it looks like that much more effort has been put in!
Ah, Hamish, what a beautiful puppy you were! Not that he's not still a beautiful dog, now, of course! But that soft, fluffy, puppy coat! This is one of my favourite all time photos of him and I think I've managed to do it justice on this page.
All the papers and wood veneers on this page were from the kit. I've added some clusters of goodies from Pink Paislee I won from Jennifer's Jumbles last year (Hi Jennifer!).
Lastly I added some ribbon, and some of my first attempt at a DIY-washi-style tape. I hope to perfect the technique and I'll share it with you then.
So from a kit that ended up containing 6 sheets of patterned paper, 5 scrap cardstock backgrounds and one sheet of journalling cards I'm left with:
a nice amount of paper left, and most of the journalling cards.
I'm thinking I might keep it all together for a bit longer, as I've another page in the pipeline.
Thanks for stopping by, I hope you'll leave a message to let me know you've been!
P.S. I loved that page of Hamish so much, I've linked this page to the Layout Love Linky at purplemailbox.com, so welcome, if you've found me from there!
Friday, February 1, 2013
January fabric stashbusting - and the Stashbusting Sewalong!
When I wrote that my goals this year were going to include some fabric stashbusting, I never really intended to do it alone. I knew that there'd be the perfect stashbusting challenge out there for me somewhere, but I don't follow a lot of sewing blogs, and I didn't have a lot of time to go looking. So I figured I'd get started, and find a challenge to join up with later.
Lucky for me, my sister has caught the stashbusting bug too, and has done the homework for me! the challenge I'm joining is called the Stashbusting Sewalong, and you can read more about it at Tumbleweeds in the Wind.
It's the sort of flexible challenge that I'm more than happy to play along with, pledge to sew as much as you want, freedom to join in specific challenges or not, and most importantly, new friends to meet in the journey!
So here's my pledge:
I, Julie Hearn, of spendlesscraftmore.blogspot.com commit to completing 12 projects from my box of fabric lengths and unfinished project box, as well a minimum of 6 other projects from my stash. I further commit only spend money on items directly related to those projects from the stash.
OK, so the first length of fabric I have to tell you about is a length of white waffle weave, about 3.5m x 1m. There it is, second from the right:
I originally bought this fabric, too many years ago, to make a summer-weight dressing gown (does that make it a brunch coat or something?) with some embroidered flowers on the collar.
White dressing gown? With embroidered flowers? WHAT. WAS. I. THINKING?
First of all, when I bought it, I would have been knee-deep in the messy baby-and-toddler-stage. Even now, I can't imagine keeping a white gown clean for more than 5 minutes. I'd just be blaming the morning coffee instead of the baby cereal.
Second of all, the summer dressing gown I currently do own gets worn so rarely that a second one would be ridiculous.
And thirdly, embroidered flowers? Back then, maybe. Now . . . just no.
So anyway, I was having trouble sleeping one night in early January. It was one of those nights that was like - doona, too hot, no doona, too cold, doona with leg sticking out, still too hot. And I was thinking about that white waffle weave fabric . . .
. . . Have you made the connection yet?
Happily, I did! The next day, I cut the fabric in half, sewed the two lengths together and hemmed it to make a summer blanket! It is the perfect weight and I've used it almost every night since.
The January challenge at the Stashbusting Sewalong is to use small pieces of fabric. I actually managed to achieve this as well.
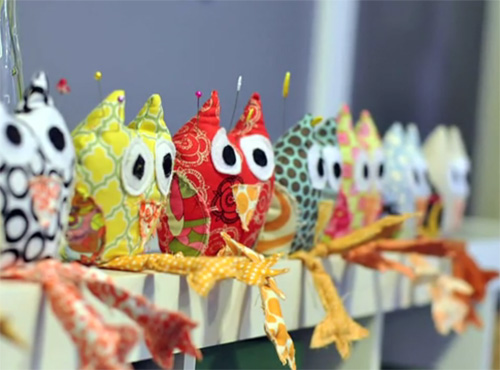
My old pincusion was pretty grotty, and full of rusting pins to boot, so I chose this, as inspiration:
and here's my version:
Thanks for dropping by, and I hope you are managing to bust your stash as well!
P.S. If you're new to my blog, and want a quick catch-up on my recent fabric stash-busting, click here for my original goals for 2013 post, here for a skirt and finished mini-quilt, here for another skirt and here for some musings on stash-busting in general. (Or just scroll back through the last month or so, if you don't mind a bit of papercrafts mixed in!)
Lucky for me, my sister has caught the stashbusting bug too, and has done the homework for me! the challenge I'm joining is called the Stashbusting Sewalong, and you can read more about it at Tumbleweeds in the Wind.
It's the sort of flexible challenge that I'm more than happy to play along with, pledge to sew as much as you want, freedom to join in specific challenges or not, and most importantly, new friends to meet in the journey!
So here's my pledge:
I, Julie Hearn, of spendlesscraftmore.blogspot.com commit to completing 12 projects from my box of fabric lengths and unfinished project box, as well a minimum of 6 other projects from my stash. I further commit only spend money on items directly related to those projects from the stash.
OK, so the first length of fabric I have to tell you about is a length of white waffle weave, about 3.5m x 1m. There it is, second from the right:
I originally bought this fabric, too many years ago, to make a summer-weight dressing gown (does that make it a brunch coat or something?) with some embroidered flowers on the collar.
White dressing gown? With embroidered flowers? WHAT. WAS. I. THINKING?
First of all, when I bought it, I would have been knee-deep in the messy baby-and-toddler-stage. Even now, I can't imagine keeping a white gown clean for more than 5 minutes. I'd just be blaming the morning coffee instead of the baby cereal.
Second of all, the summer dressing gown I currently do own gets worn so rarely that a second one would be ridiculous.
And thirdly, embroidered flowers? Back then, maybe. Now . . . just no.
So anyway, I was having trouble sleeping one night in early January. It was one of those nights that was like - doona, too hot, no doona, too cold, doona with leg sticking out, still too hot. And I was thinking about that white waffle weave fabric . . .
. . . Have you made the connection yet?
Happily, I did! The next day, I cut the fabric in half, sewed the two lengths together and hemmed it to make a summer blanket! It is the perfect weight and I've used it almost every night since.
The January challenge at the Stashbusting Sewalong is to use small pieces of fabric. I actually managed to achieve this as well.
My old pincusion was pretty grotty, and full of rusting pins to boot, so I chose this, as inspiration:
and here's my version:
Thanks for dropping by, and I hope you are managing to bust your stash as well!
P.S. If you're new to my blog, and want a quick catch-up on my recent fabric stash-busting, click here for my original goals for 2013 post, here for a skirt and finished mini-quilt, here for another skirt and here for some musings on stash-busting in general. (Or just scroll back through the last month or so, if you don't mind a bit of papercrafts mixed in!)
Subscribe to:
Posts (Atom)