Sunday, August 30, 2015

Scrapping some older photos.

 
I keep all my non-scrapped photos chronologically in slip-in photo albums and every now and again I go through them and pull out some photos to work on.  A few weeks ago I went through the oldest album and pulled a bunch of photos.  Here's the progress I have made so far:

A photo of my husband hanging out with his nephews. . .

 
 (The one lying on the bed is the same nephew whose wedding photos I've been scrapping recently.  Told you they were old photos!)

A trip to visit a friend in the beautiful Blue Mountains . . .


Then I decided to do some real stash-busting.  This next one I used thin strips of paper (mainly manufacturer strips) and washi tape, using this ColourQ challenge as inspiration:


I didn't finish it in time to play along with the challenge, but by chance the current ColourQ challenge worked with my next photos, featuring the other set of grandparents:

This time I went with circles, using only smaller scraps and 6" papers . . .


I was happy to try out my recent purchase of Technique Tuesday "Happy Day Flair" stamps which work great (unsurprisingly) with a 1" circle punch and epoxy stickers to make DIY flair.


Thanks for stopping by and I hope to catch up with you soon!

Thursday, August 6, 2015

Craft Room Reorganisation 3: Embrace the Rainbow (Flat Embellishments)

Welcome back to the third instalment of my Craft Room reorganisation series, largely inspired by Tiffany Spaulding.
Embellishment storage is an absolute mine-field of containers for us scrapbookers, isn't it?  We have jars full of buttons and tackle-boxes full of ribbons and wood veneers and brads, and eyelets that come in their own cute little containers again.  We have sheets of stickers shoved into boxes in one spot and washi tape in baskets and more embellishments still in their packaging somewhere else again.
Small wonder we never remember to use half of what we own!  Tiffany's suggestion is, rather than divide our stash up by type (buttons here, chipboard there, ribbon somewhere else) we combine and conquer!
As I mentioned in my last post, Tiffany actually has a 4-part system, which includes alpha-numeric, themes, calendar year and rainbow.  If you buy a lot of supplies by theme and calendar year (and I know a lot of you do!), you might want to visit Tiffany (here  or on Youtube here) for more information about that.  But I don't, so I skipped those sections and went straight to the rainbow!
I'm only dealing with my flat embellishments to begin with.  Most of my bulkier embellishments (ribbon, washi, buttons, brads etc) are already stored by rainbow within their own sections, but I'm yet to come up with a storage system that will unite them together.

Sometime last year I made a start on trying to organise my Silhouette die-cuts better.  I had come across a video on Youtube from LisaEDesign (watch it here) where she had made her own divided pages  by cutting and sewing ordinary office-supply A4 plastic sleeves.
I liked that idea but my first thought was to skip the sewing and use my existing 12" pocketed page protectors but I had two problems.
  1. I didn't have a spare album to put them in, and
  2. all the page protectors I owned at the time were side-opening, and the die-cuts kept falling out of them.
So I followed Lisa's idea and made my own A4 divided protectors, put them in a lever-arch folder, and that worked OK for a while, with me remembering to look through it occasionally.


This time round, I wanted to store not just my home-made die-cuts, but the bought ones as well, and also my stickers, rub-ons, cut-aparts, chipboard, pretty much anything that can be stored flat(ish).

Happily, I had recently bought a couple of Project-Life-branded albums on super-special, so now I DID have not only a spare 12" album, but some top-loading divided pages as well!


My album starts with words . . .


Then pretty much everything else, sorted by rainbow order . . .


Finishing with a small  multicoloured/themed section.

Finally, I've got my thin strips of patterned paper (manufacturing strips etc) because I liked these dividers I made too much to split them up and put them with my patterned papers. At a later date, I might make a couple more dividers and then store them in the appropriate colour section, along with my border stickers, but they're fine for now.


I LOVE my new system, and I find I am reaching for this folder Every. Single. Project. This page is a great example of how I pulled a bunch of embellishments together that I never would have thought of if they hadn't been together, sorted by colour.


Some tips (from me):
  • the "flat embellishments" versus bulky embellishments is my distinction, not Tiffany's. It all comes down to what storage system you use, but the less places you need to look to find your stuff, the better!
  • After cutting my sticker sheets apart to separate out my alphabets, I ended up cutting pretty much every sticker apart, in order to sort them by colour.  Same for my die-cut packs. Trust me, I am using my stickers and die-cuts so much more now!  I personally found it to be totally worth it!
  • If you can't bear the thought of breaking up your beautiful new sticker sheets and embellishment packs, try what Adele from Inkie Quill does and break them up after you've used them a few times.  (See her video here)That way you get the fun of your embellishments as a collection, if that's your thing, but won't be forever wasting time flicking through half-empty packages looking for that one perfect finishing touch.

August Counterfeit Kit: "Good Morning, Vietnam!"

I'm so excited to be joining in the Counterfeit Kit Challenge again this month . . .


The inspiration kit, "Globe Trotter" from Scrappy Canary fits in perfectly with my plans to scrap the photos of my oldest son's recent school trip to Vietnam!


Here's Rohan, the guest designer himself.  To be honest, I'm a bit nervous about this album, after all, they're his stories to tell, and I'm not sure how well our ideas are going to match.  When I express this to Rohan, he says " think of it as a collaborative approach" to "developing my art-making practice" and things of that nature, which gives me some confidence in his ability to write an HSC art essay, if nothing else!

But let's move onto something I'm not nervous about, creating the kit!  I've titled it, most originally, 

"Good Morning, Vietnam!"


For our papers, I already had the Pink Paisley "Atlas" 12" pad, so I've chosen quite a few of those, with the rest at my disposal if necessary.  The rest of the papers are from a variety of soures, but largely from Studio Calico "Brighton Pier".  Not the most obvious collections to pair together, I know, but enough of the papers work with each other that I'm confident it will be just fine.
I also bought the Brighton Pier 6" pad (on special, of course!), in order to use the smaller patterns for backing my die-cuts.


We've chosen a dark kraft cardstock as our background, and black cardstock for all die-cuts, including titles.  The die-cuts we've chosen so far include a map of Vietnam, a plane and some geo-tags to cover the travel theme.   For the specifically Vietnamese flavour, I've found some beautiful lantern shapes, as well as a water lily and some lovely fans.  (Although to be honest, I can't remember if the fans meet the Rohan criteria for Vietnam authenticity, but we'll see if they turn up on a page!).


That's where we are up to at the moment, I'm still not sure how we're going to fit the journaling in for example, although seeing those envelopes in the inspiration kit just now  might just be the thing we need!

Thanks for visiting, and I hope to see you again soon!

Thursday, July 16, 2015

Double page challenge: Complete!


Don't be scared, I'm not going to bore you with the whole 20 double-page spreads that  I've completed.  But here's a few of my favourites that I hope you won't mind having a bit of a peek at . . .


I'm so proud of my title on this New Year's Eve layout.  I found some super-old chipboard alphas which I inked with pigment ink and embossed with a clear sparkle embossing powder.  Love!


Next up is some photos of our first ever camping holiday as a family.  I divided the photos up so they fit on two double page spreads (above and below) and two single pages.
  

By this stage I was up to 19 doubles, and a bit over them, if I'm to be totally honest. So I decided that surely two singles sitting together from the same holiday counted as a double, making the scrapping of that holiday, and the challenge, complete!


I'm sure I've always loved these photos, of the boys sitting in the tent dressing up their stuffed toys, but I love them so much more now that my boys are hulking, grumpy teenagers, and this is such a sweet memory to look back on!


Another super-sweet memory, this time of Maddy, at about 19 months, so conked out from the adventures of camping that she fell asleep in her chair!


In fact I loved the photos so much - and the clouds - that I immediately used them again to put into Maddy's album!


I used the negative space as a stencil for my gelatos to do the green clouds . . . 


And the negative space of the pink 6" paper exactly as it was, backed by another 6" paper.


There's just one more favourite left to share with you, but I think it demonstrates the flow of my newly re-organised craft room, so I'll show it to you soon when I bring you Part 3 of my organisation series: Flat Embellishments.  I hope I'll see you then!


Sunday, July 12, 2015

Craft Room Reorganisation 2: Embrace the rainbow (papers and cardstock)

Hi and I'm back with the second instalment of my reorganisation series.  I mentioned to you last time that I've been somewhat inspired during this process by Tiffany Spaulding.
Tiffany's 4 tiers of organisation are alphanumeric, which I covered last time, followed by theme, calendar year and rainbow. 
Now I don't buy themed products, nor does my scrapbooking reflect the seasons, probably due to the mild climate that we experience here.  (I know a lot of you do though, so if this is something you want to read more about, you might want to visit Tiffany here).
 So I've skipped straight to my favourite way of storing, rainbow!
I actually already store a lot of my supplies in rainbow order, but what makes Tiffany's system a bit different is that she has a "combine and conquer" approach rather than the mentality that a lot of us have with storing buttons in one place, ribbon somewhere else, wood veneer somewhere different again, etc etc.  But that's jumping ahead to the next instalment, so let's look for now at how I was storing my papers and cardstock, and what I've done differently.

Here's a somewhat warts-and-all look at my craft desk before I updated my organisation system:


The left-hand side of that open cupboard contained a file folder with all my patterned papers in it.  At various times I had tried storing by manufacturer or rainbow, or a combination of both.  Also in there is my home-made folder which stored my large off-cuts (which you can see back here).  That wooden stand on the top of the cabinet held my cardstock, in beautiful rainbow order but a bit too high up for easy accessibility. Also up there is the green expanding file which contains A4 and A3 cardstock or card-making. Finally the drawer you can just see in the bottom right of the photo holds my small scraps box (also shown in the link above) as well as my 6" pads.
Inspired by Tiffany to "combine and conquer" as well as her suggestion that vertical storage is easier to flick through than horizontal, I asked my lovely husband if he could put a top and bottom on the wooden stand.
He also painted it white for me to better match the Ikea cabinets, 'cause that's the great kind of guy he is. Here's what things look like now:


On it's side, the wooden stand now holds pattenered papers as well as cardstock, all in rainbow order.  I separated out the "large scraps" folder, and each coloured divider is stored in there as well.
 
I didn't have room for my A4 and A3 cardstock, so they're staying where they are for now.  Against Tiffany's advice, I've kept my small scraps box (although it is due for a cull and perhaps a "use-it-up" challenge).

I've kept my 6" papers in there as well, the difference being that I've pulled all the papers out  and they are now stored in rainbow order.


 A couple of tips from Tiffany:
  •  I pretty much skipped the "cull" step, but if you're the sort of person who has more craft supplies than they can use in a lifetime (and probably a collection that continues to grow) it's worth culling as you go - scraps that are smaller than you ever use, and patterns that you just can't imagine using any more.  Again, refer to Tiffany's website or Youtube channel if you need more direction with this.
  • regarding multi-coloured papers:  It's fine to have a section at the end which is "rainbow" or multi-coloured papers, but it's worth looking at each paper and thinking "what is the dominant colour" or "what colour on this paper speaks to me the most" and then storing in that colour section.
  • regarding double-sided papers: store in the section with the side you love the most.  If you have two sheets, you could always store one side in each section.  But don't stress about this too much, because it's easy to flick back through the papers and check the back sides!
I am loving how easy it is to flick through my papers and cardstock and see what I have! Part 3 coming soon, flat embellishments!


Saturday, July 4, 2015

Some holiday double-pagers

A lot's been happening in my craft room over the last week or so, especially this weekend, which is my semi-regular stay-home-while-Rob-takes-the-kids-down-to-visit-his-mother-while-I-stay-home-and-scrapbook-weekend!

This morning I posted my first of a series of craft room organisation posts, this one on alphabet storage, so if that's something you might be interested in, I invite you to scroll on down and have a read.    The next instalment will be on papers and cardstock, and I plan to have that one up in the next day or so.

As well as organisation, I've managed to do a mammoth 14 double-page spreads for my self-made challenge to do 20 double scrapbook pages. 

Many of them are stock-standard school class photos, which I have no intention of boring you with.  But I do have a couple to share today, both from the same family camping trip, nearly ten years ago:


You didn't think I'd be able to do 20 double pagers without the help of at least one sketch from Lets Scrap, did you?  I know I didn't.

The next page utilises their current sketch:

And here's my take on it:


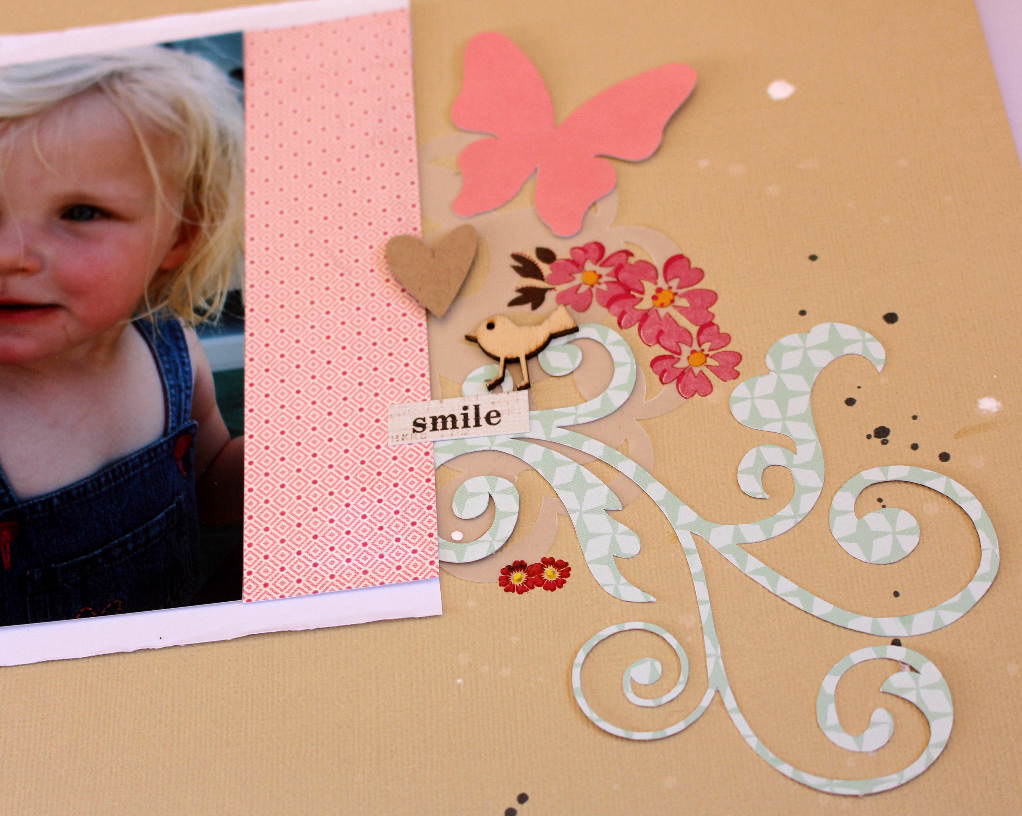
We had picked a windy week for this particular camping holiday, and I thought the white flourishes did a nice job of representing the wind without detracting from the photos.  This page depicts a couple of the activities we did while escaping from the windy beach-side caravan park.


I hadn't originally intended to add the butterflies, but did so in order to disguise a rather nasty splatter incident.  Again, being white, I don't think they distract too much from the story.


Thanks for visiting, and I hope you're finding yourself some crafty time this weekend, too!

Craft Room reorganisation 1: Embrace the alphabet

For the longest time I was in denial, believing that I was the sort of person that didn't really buy stickers, alphabet or otherwise, and certainly couldn't justify the cost of Thickers, no matter how great they looked on a finished page.
Meanwhile the pizza box I stored all my stickers in slowly filled and eventually overflowed.  Mostly the ones you get in collection packs, but also the odd sheet (even, yes! Thickers) that I bought on special. Always on special. Not a lot, but over time it starts to add up.

I was finding I was reluctant to rifle through the box, and that when I did, I ended up with random letter stickers coming off their sheets and turning up in odd places.


Something Had to Be Done.

 I came across a Craft Room Tour on Youtube which mentioned Tiffany Spaulding, AKA "Totally Tiffany" and her organisation process. (If you've not heard of her before, you can find her Youtube channel here). Tiffany has live challenges running periodically, but if you're like me and just want to start when you want to start, you can just dive right into the videos and work at your own pace. 

Tiffany has what she calls a "four section system" which works throughout the whole craft room, the four sections being:
  1. alpha-numeric
  2. themes A-Z
  3. Calendar year
  4. the rainbow.
Today I'm just looking at her first section, alpha-numeric. So here's what my before looked like: letter stickers and Thickers shoved into a pizza box in a random order with all other sticker sheets.  A few old chipboard alphas in a drawer designated for chipboard.  Some rub-on alphas in a totally different drawer.  And a bunch of alphabet stamps stored with all my other stamps.
This is my after:


Now, I know this is not a lot of supplies compared to many of you, but the same principles would work whether you have one box of alphabets or ten.

Some tips from Tiffany:

  •  Store all your alphabets together, whether they be Thickers, rub-ons or whatever. That way, when you think "I need to make a title", you've only got to go to one place to see all your suplies.
  • Store your alphabets by size.  As she points out, when you're working on  a title, you've got a finite space  to work within. (You can always sort by colour within each size category)
  • Stamp out an impression of each set of alphabet stamps that you own, and then store that impression in the appropriately sized section of your alphabet storage.  That way you'll literally be reminded of every alphabet option you have as you flick through, even though you'll probably have your stamps stored in a different location.

Some tips from me:

  • Store all your stickers in plastic sleeves. (I've used A4 sheet protectors.  If I had less options, I coud literally put the whole lot in an A4 folder).  This is easier to pull your stickers in and out of than their original packaging, as well as providing protection.
  • Cut your sticker sheets apart! You know the 12" ones that might have 2 or 3 different sizes/colours/fonts?  And maybe some words, tabs and images as well? Separate each alphabet out and store it according to size.  Trust me, it makes it easier!
I hope this is helpful to someone.  Of course, you can go and check out Tiffany's Youtube channel above, or go to her website if joining in her challenge is something you think you'd like to do.
For my part, I'll be back soon with at least 2 more posts in this series.
Bye for now!