Saturday, September 16, 2017

Scrapbook Spending Freeze 101

Hi friends!
Wow, it's been a long time since I've posted here.  I've had a few other things going on so I haven't been in the craft room quite so much since my spending freeze finished, and any scrapbooking stuff has made it to Youtube but not here. 
I had enough positive comments about doing my 100 page spending freeze that I decided I wanted to share what I learned through a series I've created called "Scrapbook Spending Freeze 101".  I have 3 lessons already loaded on Youtube, with probably another two to go.
There's also a group to join on Facebook, and it's for anyone contemplating a Spending Freeze, whether you're ready to start straight away or not, and don't worry, I'm not forcing you to do all 100 pages if that sounds too daunting!

Here's episode one:


Catch you all soon,
Julie 

Thursday, July 20, 2017

Final page of my 100 page spending freeze!

As promised, I thought that the final page of my 100-page spending freeze was deserving of a video.

For inspiration, I took the mood board from Scrapbooking Top 50 this month:


So cute!

Here's my video . . .


. . . and some photos . . .


This page tells the story of how I broke my foot at the start of this year!
Not only is it the story of an accident, but it is a page on which a few accidents happened.  We want all our pages (and process videos!) to be perfect, but that's just not real life, is it?  I'm glad I persevered  with this page - I'm happy with how it turned out, and mistakes are how we learn, right?


Thanks for visiting, and let me know if a short series on doing a scrapbook spending freeze is something you'd be interested in watching?

Sunday, July 16, 2017

School holiday scrapping.

It's the end of our two week mid year school holidays around here, and the time in the craft room over the holidays is always a bit erratic, and the time on the computer to blog about it even more so!
But I've grabbed my turn on the computer tonight to finally show you what I've been up to over the past couple of weeks, with pages using my last month's Counterfeit Kit and my Cocoa Vanilla "expand a collection" kit (with not much Cocoa Vanilla left!)

Let's start with a challenge, shall we?

I do like a good sketch challenge, and Stuck?! sketches is one of my regulars:


Dolphins and whales are always wonderful to watch, but ridiculously difficult to photograph!  On this dolphin cruise page I put a frame around the other dolphin watching boat and the little speck in the water that is a dolphin fin!


I also completed my July Stash It Monday video for the Crafty Mavens Getaway channel, which went live a week and a half ago:


And some more pages:


A warning: the last page I am going to show you is about my son's infected toenail that he had a couple of years ago.  Scrapping doesn't always have to  be about the good stuff all the time, does it?  But if you have a delicate stomach for such things, you might not want to scroll down to the end!

But exciting news!!  The pages I'm showing you bring me to 99 pages out of my 100 page spending freeze!  As you can imagine there is much rejoicing in my craft room as I come to the end of this phase, (and much thinking about what I might buy in my first purchase). I think page 100 deserves a process video, don't you?  Hopefully I'll be back with that in a couple of days.

Oh yeah, and here's the gross toe page . . . 


Thursday, June 29, 2017

Two challenges with June Counterfeit Kit

I had high hopes for finishing my spending freeze this month, starting about 5 pages on the long weekend,  but then life got in the way! 
I have a drawer full of photos waiting to be scrapped and it is in a woeful state! I started this month by going through an envelope of photos and making up little page kits from my June Counterfeit Kit, mostly just paper and cardstock.  I did pull some more supplies as needed - this doesn't bother me at all!  I see a kit as a starting point and have no problem pulling out extra stash.

This first page has a process video and is for Scrapbooking Top 50's challenge for the month:


The photo I chose to scrap isn't the most non-perfect photo - it's really just the bad lighting, but the story is definitely "real not perfect", telling about an attempt to make a pavlova with stevia instead of sugar, early on in my sugar-free days.


I had some white rub-ons in my kit, and I decided to rub them onto my background and then do my gelatos over the top. I love how that turned out!


Next up I used this sketch from Stuck!?:


This was the perfect opportunity to make sure I used some of the Stampin Up butterflies I included in my kit!


I had more photos from the same day so I made a companion page to go with it:


Friday, June 9, 2017

New video for the Crafty Mavens Getaway Channel.

Hi friends,
If you didn't already know, I am on the current Design Team for the Crafty Maven Getaway Channel.
My latest video is up, this time I am doing "Sketch It Out Thursday".

I wanted to do a current sketch challenge, and ended up choosing this one from Anna's Craft Cupboard. . .


Here's the inspiration board for the week:

As you'll see in the video, I was inspired by the watermelon red/pink, the black scripty writing and the sunset!


Thanks for visiting!


Wednesday, June 7, 2017

April Counterfeit Kit wrap-up.

Although I didn't quite meet all the goals for my April kit, (what with a holiday, work, illness and other projects), but I decided it was time to put it away and start again.  A few bits and pieces have moved into my latest Counterfeit Kit, and I made 7 pages in total:


The bright colours in this kit were perfect for this page about Maddy's Drama Club performance, where her character was a stand-up comedian on an X-Factor-type show.


Another one from Maddy's primary school days, this time a Book Week Parade:


And a string of birthday pages for the boys:


For this page, I resurrected the method of using both sides of a sheet of patterned paper by cutting it a third of the way across, flipping one side and reattaching it, in this case by adhering a thickish offcut of cardstock at the back and a packaging strip on the front.  Actually, that was one goal I think I did achieve this month, I think I used at least one packaging strip/thin strip of paper on every page!


Finally, a fun page where I was reading "Winnie The Pooh" with our pet rabbit on my lap - we all need to be exposed to the classics, don't you think?


Did you spot my DIY flair on some of those pages?  I've recently uploaded a video to Youtube outlining my super-cheap and easy method, along with a couple of tips:


Two of the pages above have process videos, also - if you want a laugh, I totally recommend the Bookweek one if you haven't already watched it - Maddy and Rohan do the voice-over for me and it's very funny!


Thanks for visiting, as always I love sharing my creative process with you!

Monday, June 5, 2017

June Counterfeit Kit

Every couple of years or so I consider joining a Scrapbooking Kit Club.  I look at all the different websites, compare the style, the amount of papers, embellishments, stamps etc, then do the maths: kit plus postage(mostly international) times conversion rate.  The result is always the same - I simply cannot justify the price! I actually have a bit of an idea up my sleeve I want to try once my spending freeze is over, but in the meanwhile, I've got the Counterfeit Kit Challenge to keep me distracted!

Excellent timing, because who was in my top 2 kits this time around, but Felicity Jane!  This month's inspiration is their May kit, "Willow":
So pretty! How close can I get to making a similar kit?  You can watch my process and find out:


After doing 80 pages on a spending freeze, I was stoked with how great this kit pulled together! With any luck, this kit plus the odd other project will see me through to the last 20 pages of my spending freeze.  I can't wait to start playing!


Friday, May 26, 2017

May Scrapbooking Top 50

 Friends, before we get onto the crafty business at hand, I'd like to let you know that I will be participating in the Act For Peace Ration Challenge during Refugee Week.  From 18-25 June I will be eating the same rations as a Syrian refugee - just a small amount of rice, lentils, chick pease, sardines, oil and kidney beans.  That's it - no meat, coffee or alcohol.  (And between you and me the hardest bit of all that is the no coffee!!!)
Sponsorship in this challenge will help provide urgently needed food rations, healthcare and education to Syrian refugees.  If you are interested in donating, or just want to know a little bit more, please visit my sponsorship page:
I am taking the Act for Peace Ration Challenge during Refugee Week and opening my eyes to what it's like for refugees to survive on rations. From 18-25 June I will be eating the same rations as a Syrian refugee - just a small amount of rice, lentils, chick peas, sardines, oil and kidney beans. That's it. No meat, coffee or alcohol. - See more at: https://actforpeace.rationchallenge.org.au/fundraisers/juliehearn#sthash.gzdFbM4L.dpuf

I am taking the Act for Peace Ration Challenge during Refugee Week and opening my eyes to what it's like for refugees to survive on rations. From 18-25 June I will be eating the same rations as a Syrian refugee - just a small amount of rice, lentils, chick peas, sardines, oil and kidney beans. That's it. No meat, coffee or alcohol. - See more at: https://actforpeace.rationchallenge.org.au/fundraisers/juliehearn#sthash.gzdFbM4L.dpuf
 https://actforpeace.rationchallenge.org.au/fundraisers/juliehearn

And now we return to regularly shecduled programming . . .

After completing 18 school photos, production-line style (which you can read about in my previous post) I was ready for something a bit different! A challenge, perhaps?

I chose this month's sketch from Scrapbooking Top 50:


How cute is that!

here's my entry:


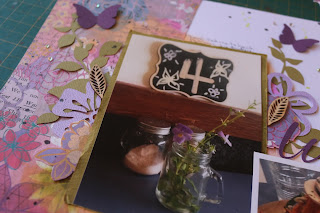
I ended up binge die-cutting for  this one - creating whole pages of leaf fronds, flowers and butterflies, which I think took longer than the rest of the page put together!


So happy with how this one turned out!  This page also marks the three-quarter mark of my 100-page spending freeze, so that's exciting! 

Thanks for visiting and I hope to see you again soon!


Scrapbooking school photos, production-line style.

So guys, if there's one thing I find boring to scrapbook, it's school photos.  The limitation of school uniform colours (which for our family have included maroon-and-gold and currently includes forest green) and the sameness of the format, year after year, times three children.  No wonder I'm so far behind!

But on the flipside, when you get into the zone, catching up on a whole bunch of school photo pages at once is a great way to churn through a bunch of pages - in less than a week I've managed to make 18 pages towards my 100-page spending freeze goal!


If you've never thought of doing a production line of pages, here's my process:

Step one: choose the photos you want to scrap, keeping to one theme. 
In my case, the theme is obviously school portraits, but you could apply the same process to many other themes, eg beach holidays, birthday parties, christmas etc.

Step two: Choose papers
I pulled out school uniform colours and whites/neutrals.  For layering I pulled my large scraps in these colours as well as yellow and red for contrast. 
(Optionally, you can focus on particular products you want to use up - I focussed on two paper pads I still had quite a few papers from)


Step three: Adhere papers and photos.
(But don't put your papers away just yet!)

Step four: titles
If you own a die-cutting machine or letter stamps, now is the time to use them!  With repetitive titles like "Year 5" "Year 6" "Year 7", now is not the time to be wasting all those "a's" and "e's"!
I picked out a largish offcut of cardstock that matched a page, chose some other pages that could use the same colour title, and went to work on my Silhouette.  I simplified the process further by using the same font and text size.


Step five: embellishing. 
Again, rather than go through every embellishment in your stash, pick a small selection that works with your theme.  I chose a set of largish wood veneers and my fake enamel dots.  I also used washi tape, the branding strips from the papers I had used and also cut a few circles from my left-over papers to give my embellishments somewhere to sit.


Step five: Journaling and finishing touches
I don't journal a lot (or sometimes at all) on school portrait pages, so this step is easy.  Finishing off meant splattering and trimming off the bits that hung off the edges.  But of course you have full permission to go back and pull more bits from your stash.  I was doing a couple of soccer portrait pages at the same time, and I went back and made fake flair for those pages.   


Have you ever tried production-line scrapbooking?  Whatever your preference, I hope you find some crafty time this weekend!