Saturday, November 26, 2016

Sorting Patterned Papers.

So my oldest son, Rohan, completed his last HSC exam, turned 18 and did his first shift at Macca's, all in just over a week.  That's a pretty big week!

Currently his plan for next year is to take a gap year before starting Uni the year after, work at Maccas, make art videos and become a Youtube superstar, as you do.

Being the super-proud Mum that I am, here's his channel, MadeByRohan.

At about the same time that he and my husband were making a camera rig for his desk, I bought a huge huge huge stack of patterned papers (all on special of course) so I thought, why not start my own Youtube channel and make my own videos, starting with one on how I sort my patterned papers.  So I did! And here it is:

(Warning: it's literally me rambling on about papers for nearly 15 minutes, so if that sounds boring to you, I won't be offended if you don't watch it!!  Also I didn't check the focus before I started, so it isn't great. Sad face.)


My son said to me, Mum, your channel is called "Spend Less Craft More" and one of the first words you use is "splurge".  And it's true, I have let my stash build up a scary amount since starting this blog however many years ago, so I have a spending freeze challenge in mind for myself in the new year.

Stay tuned!

Wednesday, November 16, 2016

November Counterfeit Kit - first 3 pages

This year, my blog has read like one long series of failed attempts to get back into the craft room.  Which it kind of has been.  Mind you I still stand by the list of tips I posted here and here
It's been more of a case that I haven't been in the right head-space for crafting.
What's helped me this time (as well as a tip I shared earlier - gather some supplies together into a kit!) is my tip number 5:
Choose some low-pressure photos to scrap
and tip number 6:
scrap in a way that you're comfortable with, rather than trying out something new and daunting  
 
This month's Counterfeit Kit, which I've called "Dinosaur Tales" has a bright, sunny vibe that leans towards little boy photos, so my first stop was Angus' album, and I've pulled a number of photos from 2008 and 2009.  None of them have a particularly memorable story to go with them, but they're memories I'd rather scrap than not.

 It turns out that even when I'm flush with supplies, I still don't find it very easy to cut into brand new sheets of paper, so I chose one or two sheets to match each photo/set of photos, planning to add off-cuts from other sheets as I make them or from my stash as required.

But enough chit-chat, let's see those pages!


There's that dinosaur paper!  (And would you laugh if I told you that I gutted the centre of both the dinosaur and blue papers before adhering them down?)


I've cut a sheet of circles from vellum and added them to the kit, I love how they make a little home for the buttons and wood veneers. 

Thanks for visiting, and I hope you'll take the time to say hello and share with me your tips or stories of how you like to get back to the craft room!

Wednesday, November 2, 2016

November Counterfeit Kit

I recently had a bit of a splurge on discount papers at one of my favourite online stores. Before I'd even opened the box or seen the inspiration kit for this month, I decided I wanted to make a Counterfeit Kit using these new papers.  Want to see how I did it?

Here's this month's inspiration kit, "City Park" by Cocoa Daisy:


The very top paper in my parcel was a cute dinosaur print from Echo Park "Little Man" and it struck me as being a similar style of whimsical print to the trees and acorns in the Cocoa Daisy kit.  Unsurprisingly, it became the starting point of my November kit . . .

Dinosaur Tales


As you can see, I've taken the kit from an autumn theme to more of a boy/summer theme.  There's plenty of Echo Park here,  as well as "Little Man" there's "Anything Goes", "We are Family", "I Love Sunshine" and "Sweet Summertime".  Then there's  a sprinkling of "Shine" from Maggie Holmes, and some token October Afternoon "Travel Girl", Simple Stories "I Am", and "Memorandum" and "Cedar Lane" both from Pink Paislee.


When it came to alphabets, I had the sticker sheet from "Little Man", so that was an obvious choice, and I've added a set of black Thickers.  The box of wooden icons (from Kmart of all places!) has a similarly whimsical feel, and using some of them might help me work out how to store the rest!


Wanting to keep the embellishments simple, I've added some washi and bakers twine . . . 

and I plan to leave my boxes of buttons, brads and eyelets out on the desk, in the hope that I use some of those too!


Wednesday, May 4, 2016

DIY Patterned papers (May Counterfeit Kit)

Here's what the Counterfeiters are inspired by this month from Crafty Templates  . . .


Very pretty, but the thing is, I don't have anything in my stash that resembles my favourite elements of this kit.  What's a respectable Counterfeiter to do but DIY some papers of her own?

Can you guess which ones my favourites were?


Let's go through them one by one, starting on the left with my vellums . . .


I picked a couple of stamps and stamped away on plain vellum, which I embossed with gold powder.  The one on the right is a bit 90's weddingish perhaps?   That's OK, I went to plenty of weddings in the 90's!


For the bokeh-inspired paper, I started by watching this video here:
 https://youtu.be/1hnLvIDciSE,

My process ended up being similar, but I used gelatos and the packaging technique for my background, before making up a quick stencil on my Silhouette and sponging white ink through that.


A close up of the texture.
 I could have done the turquoise paper the same way, but this time I stamped circles all over my cardstock using white ink and clear embossing powder, before adding my gelatos over the top.


Close-up
Finally the black and white striped paper.


Using my cutting mat as a guide, I marked off one inch stripes with a washi tape I don't love.  I then transferred my cardstock to my teflon craft mat before painting the stripes.  I did two coats for good measure . . .


After the paint was dry, it was just a matter of carefully peeling the washi tape away!


So what do you think?  None of these techniques were difficult and all of them were fun!
Let me know which one is your fave? Or do you have some other DIY tricks up your sleeve?
Talk to you soon!

Sunday, May 1, 2016

Road less travelled . . .


This Robert Frost poem was important to my son when he was going through a rough time last year.
This weekend, I've recorded that for his album, with the help of this lovely inspiration from ColourQ:


Here's the completed page:


Thanks for visiting!

Saturday, April 30, 2016

Scrapbook Boutique April Challenge

With Mothers Day just around the corner, I found the perfect inspiration to go with my photos from Mother's Day last year . . . this beautiful Mood Board from Scrapbook Boutique:


Here's my page:


Maddy surprised me with a "spa and manicure kit" which she'd made using recipes she found on Pinterest.  What a great Mother's Day present!


I created my background using gelatos, and used my Silhouette to cut the lovely filigree roses.

Thanks for visiting!

Thursday, April 28, 2016

Back in the craft room . . . Take 2!

 Last time I posted, I shared three of my strategies for getting back into the craft room and then . . . over two months of . . . . nothing . . . 
Without boring you with the details of my absence, I'm back with another two strategies! (and by the way I finally printed out some photos and there'll be some finished pages to share with you soon)

Tip 3: Make a card (or a dozen!) Even when the inspiration to scrapbook some photos isn't there, we can always pull out some of our scraps to make a card! And who doesn't need a few every now and then - and often when we're least prepared!


I loved playing with these beautiful Darkroom Door feather stamps on this first card. Here, I've used clear embossing powder on tone-one-tone cardstock, but I can't wait to play with them some more in lots of other ways!


I've already given a card like this one away before I had time to photograph it, using the hearts I made for my February Counterfeit Kit (and the left-over branding strips).  The lovely scripty "happy birthday" stamp is also from Darkroom Door.

Tip 4: for want of a better term, I'm going to call this one a craft room "spring clean", even though it's Autumn here. Mine looks something like this:
  • Re-ink my stamp pads. I like to do this at least once a year, as they do seem to dry out, even if they haven't been used much. I give every re-inker a good shake, whether I use it or not, to prevent the ink from separating.
  • In the same vein, I go through all my paints, mists and other wet media and give them a good shake as well. Anything that's gone hard might as well be thrown away.
  • Update my catalogue.  Many of us have some form of recording what items we own.  Here, I've updated my new ink pads in the appropriate place.  At the same time, I stamp the colour on a scrap of white cardstock to attach to the bottom of the stamp pad, which I store them in a drawer upside down.

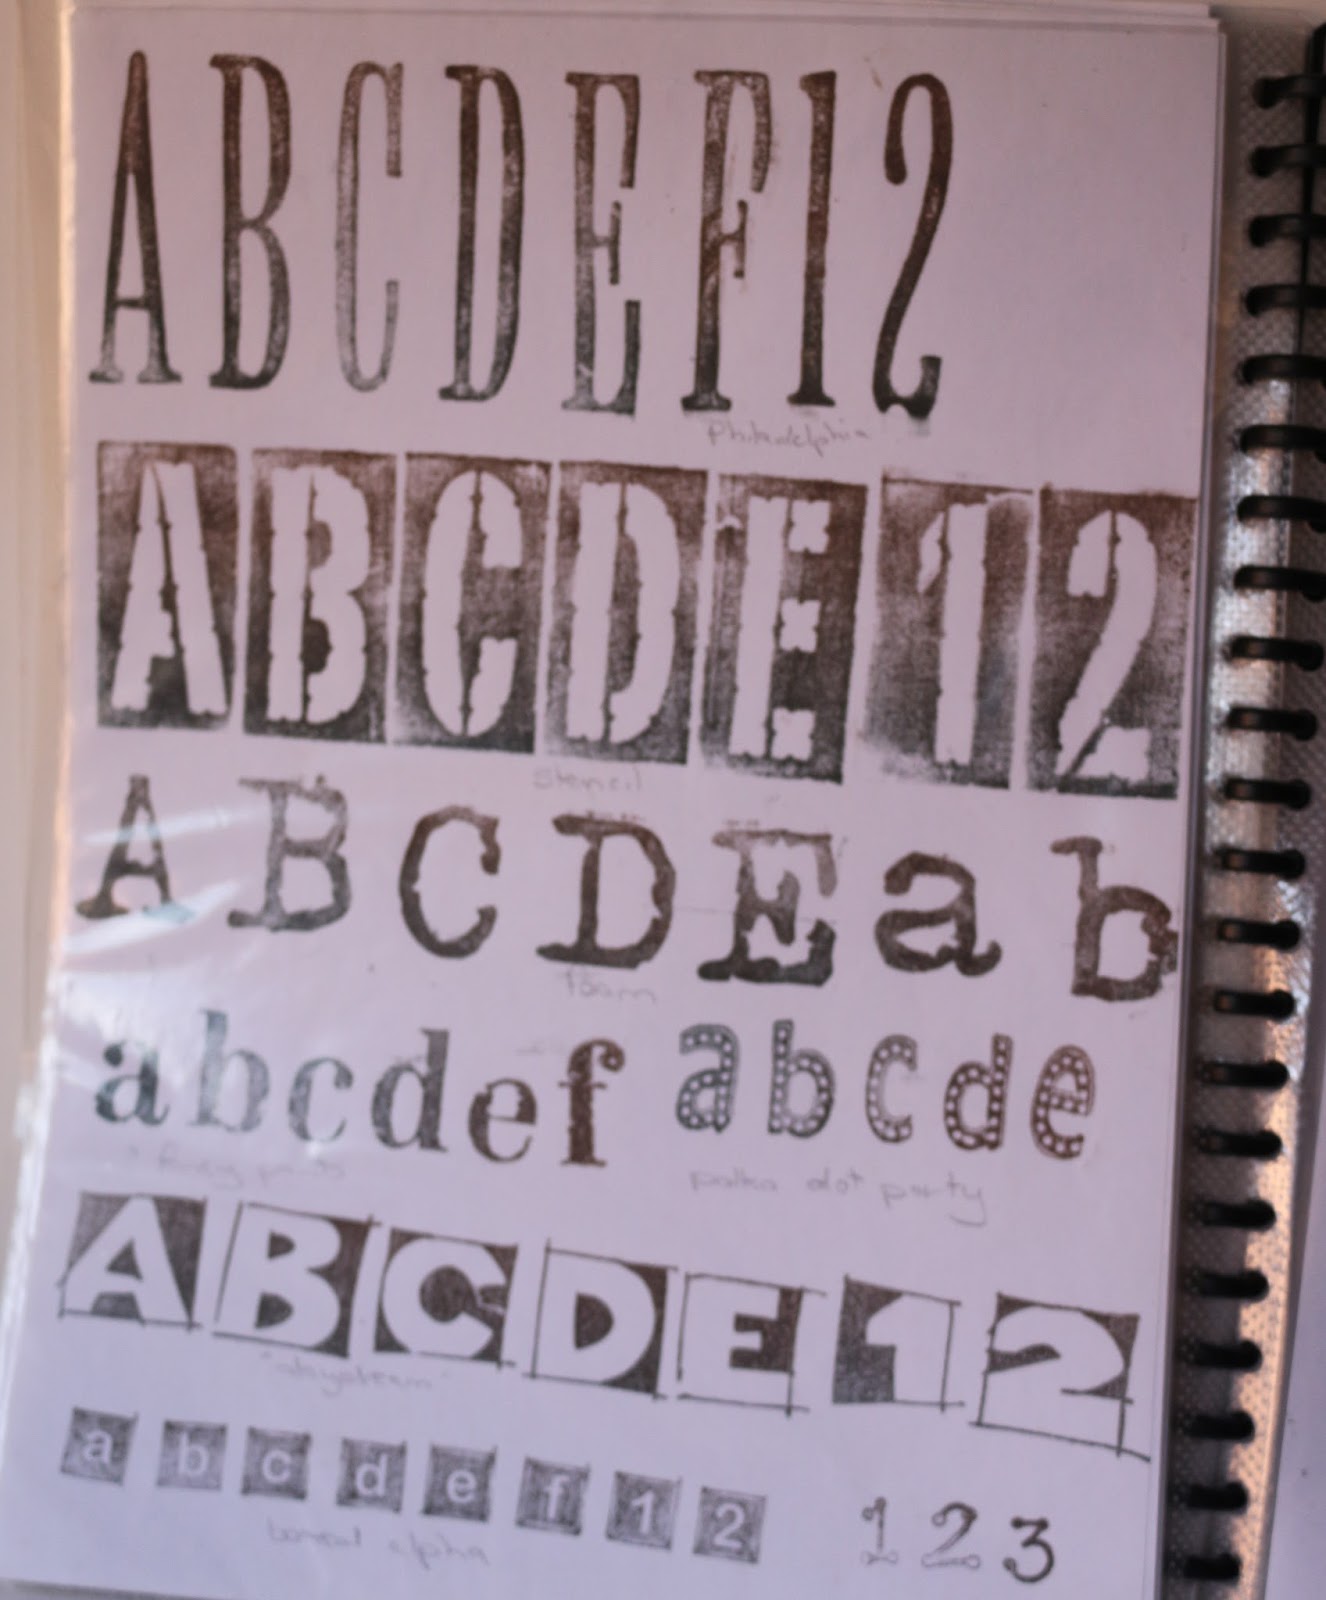
In the same folder, I stamp out all my images. I have pages devoted to categories like flourishes, flowers, words and phrases, and so on. (Here's a page of font stamps, below)  So stamping out my newer stamps is the next step of my process.


 And while we're on the subject of stamps, here's how I store my unmounted ones, in these plastic file boxes.  But some of the categories have become a bit unwieldy and some boxes aren't labelled at all, so re-organising these boxes is on my to-do list as well.


That's enough for me this time around.  Even just glancing through my stamps is making me itch to start using them again!

What about you, what jobs will you be including in your next craft room clean up?

Thursday, February 11, 2016

February Counterfeit Kit

Hi and welcome back as I attempt to get back into the craft room for the first time this year! If you're a Shimelle fan you'll know she's recently brought back her alter ego "Glitter Girl" and one of the first videos was on how to get back into scrapbooking after a break. 
Other than watching Glitter Girl, here's my three tips for getting back into scrapbooking . . .
  1. Clean your desk.  After a couple of months of disuse, this was a bit of an archaeology dig.  Among other things, I came across my last crafty purchases, not yet put away, random stacks of mail, including an overdue bill (oops!), with the last project I was working on buried at the bottom. A clean desk always gets me itching to start a new project!
  2. Print off some new photos.  I don't print at home, but tend to get them done in batches every few months.  That's what I plan on doing after finishing this post! 
  3. Gather some new supplies. What I mean to say is, gather some supplies together in a new way! And that's where the Counterfeit Kit Club comes in, with inspiration each month to help us do just that.  
Here's what they came up with for February, from "Mind the Scrap":

I loved the colours, but didn't have a whole lot of supplies in common with the inspiration kit this month. So I just took the colours and started from there . . .


I was happy to leave my kit just at the paper this month, and pull embellishments and alphas as I go, but I couldn't resist having a go at those Maggie Holmes hearts . . .


My version is made entirely from my stash of paper strips! How fun!

Thanks for visiting . . . but before you go, why don't you share your strategies for getting back into crafting after a break?