Tuesday, November 26, 2013

One day when I was waiting for the phone to ring . . .


It was a slightly stressful day a few weeks ago, we were about to embark on making an offer on another house (we've since exchanged contracts and are aiming to move before Christmas! hysterical shriek of laughter!), and I was wandering around the house for half the day, both phones in hand, waiting for the Real Estate agent to ring me back.  I found it hard to settle into anything productive, and the one thing I really wanted to do - getting up the ladder with the power tools - was really not an option!  Eventually, I found myself in the craft room. At last! Something I could settle into.

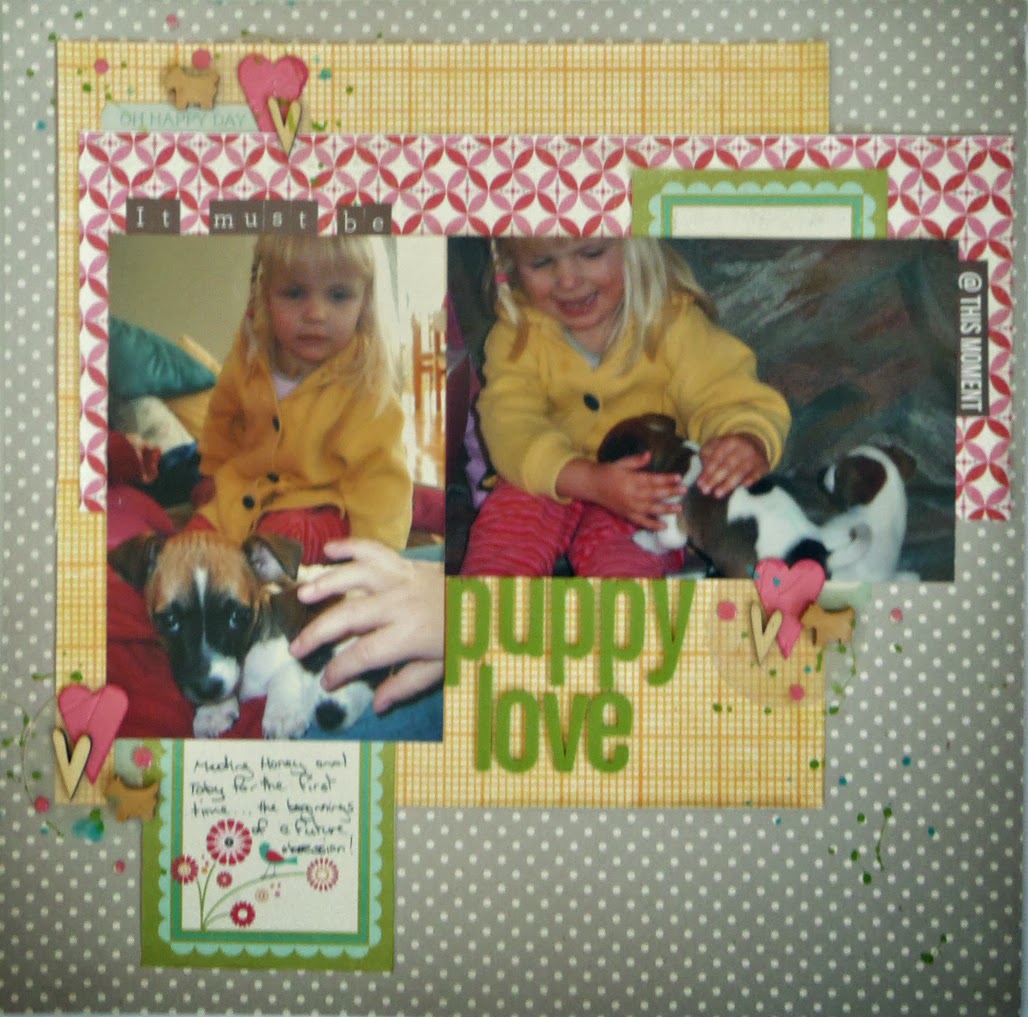
First up I finished this page, which came together pretty quickly as the main elements had been on my desk for a week or two:


I inked the thickers to get a shade closer to the other elements on my page, which fits in nicely with Challenge #2 at the Counterfeit Kit Challenge, to alter the colour of something on your page.


Next up, I started a page for the Scrap the Boys challenge of "Man's Best Friend".  I took the literal approach and scrapped an old photo of Angus with our friend's puppy.


At the same time, I took the Kraft It Up challenge to use Wood Veneers.

Well thanks for stopping by, I don't think there'll be too much more action on this little blog over the next month or so, but I've still got plenty of goodies in my October Counterfeit Kit, "packing boxes", so you never know . . .

Monday, November 4, 2013

The page that took me most of the month . . . and the one with the grid.


 You might have read in my last post about how we'd had an offer accepted on a house and that we were madly packing . . . or you might have read that same post later in the month where I updated it to say that the sale had fallen through. {Massively big sigh}.

So, while the packing is on hold for the time being, I'm no less busy, as we're still preparing our house for sale . . . painting, repairing the deck, gardening, more painting . . . you get the idea. Oh yes, and back to the round of Saturday morning open houses, of course.

So first up, the page that took me most of the month to put together . . .


I've packed the folder with all my photo proofs in it, so I'll have to add the date in later . . .

Then, because I wanted to feel at least a little bit a part of the Counterfeit Kit Challenge, I decided to take on Challenge #3, to use a grid.


I like this type of page for when I want to put something  together pretty quickly. As a bonus, it only requires one full sheet of paper (which I cut the middle out of) and the rest can be 6" pages or off-cuts.

Still plenty left in my kit to see me through the next month or so . . .

Wednesday, October 9, 2013

October Counterfeit Kit

Exciting news!!! We've made an offer on a house and it's been accepted! Perhaps I've heard one too many gazumping stories, but in the very competitive property market around here at the moment, I'm not going to breath easy until the contracts have been exchanged later in the week.  Not that that's stopped me starting to pack - after 18 years in the one house, I'm going to need every packing day I can find!

So after hardly touching my craft supplies over the last month or so, it might be a touch optimistic, but as I was sorting through my craft room today, I put a Counterfeit Kit together. Hopefully it will be enough to sustain me in the weeks of packing and unpacking ahead!

This month the inspiration kit comes from Cocoa Daisy.


I see lots of navy blue . . . and a ruler paper I own, from Echo Park "Beautiful Life" collection.  I think I can work with that!

Introducing my October Counterfeit Kit, "Packing Boxes":

Unedited photo straight from my phone, my computer's on the blink.

  I started with the ruler paper, and a few other papers from the same collection, then went with those colours, (especially the navy) but also added in a bit of pink, some neutrals and a sheet of orange.

Next, I added a huge pile of co-ordinating cardstock. I threw in a few strips and other paper off-cuts from previous kits that hadn't been de-kitted.  There's also some little bags of buttons, chipboard and cute little stick-pins, mostly from my Jennifer Grace kit.

Lastly, I pulled some washi tape and some die-cuts, including butterflies, arrows, tickets and journalling spots.

I haven't pulled any alphas, as I've collated my entire collection in a pizza box, which I'll keep out with the kit.

At this stage, I still have access to all my supplies, but I'll be putting aside some other supplies, tools and of course photos, before the rest of the room gets packed away.

How about you, are you finding some crafty time this month? Let's hope I can!

UPDATE: This particular house has fallen through, due to a much too scary building inspection. So it's back to the weekend rounds of Open Houses, and we've ramped up the speed at which we're working on getting this house ready for sale, so still not a lot of time left for crafting! On the marginally brighter side, the family computer is back, complete with photo editing software, and I hope to have a page to share with you soon.

Thursday, September 5, 2013

What I got up to in August.


August for me saw me working, painting (at an agonisingly slow pace!), gardening . . . and caring for a husband after his recent knee surgery.

When it came to craft, quite frankly, the other activities zapped the energy right out of me. I was more likely to be in bed with my laptop, watching Youtube process videos or pinning on Pinterest than engaging in anything creative myself!

I was also much better at starting projects than I was at finishing them, but this morning I finally finished two pages using a mixture of stash items and my August Counterfeit Kit, "From England With Love".


I don't expect you to remember this, so I'll just point out that my August (oh who am I kidding, I may as well call it August-September) counterfeit kit was actually a kit put together for me as a prize by the talented Jennifer Grace.

 To see how Jennifer created the lovely faux-wood veneer pieces I used on this page, hop over to her old blog, here. 


When she was putting the kit together for me, Jennifer suggested that I could challenge her to make something for the kit, so I requested a banner made from paper scraps.  I love how she used the two different banner shapes on this one, and it has me yearning to sit down with my own scraps and cut away!


I've finished my coffee, so it's time to go out and do some more painting, but hopefully it won't be quite so long before I have something more to share with you! I hope you're finding some time for your crafty endeavours, too!

Sunday, August 4, 2013

August Counterfeit Kit

When a family that's lived in the same house for well over 15 years suddenly starts attacking their neglected front yard, de-cluttering like crazy and spending hundreds of dollars on paint, what does it usually mean?
That's right, it probably means they're getting their house ready to sell up and move on.
In our case, the move is not yet a 100% certainty, but we're going with the probability and getting a few things done around the house that we'll be happy to have done even if we stay.

Throw out a few bins worth of rubbish?  Absolutely!

Donate boxes of old children's books to a good cause?  You bet!

Paint the last few rooms that need painting?  Sure!

Tidy up the front yard?  Why not!

Repaint the exterior?  {Sigh} Well, it sure does need doing!

So at first thought I didn't have time to play along with the Counterfeit Kit Challenge over the next month or so . . . until I remembered a certain box of goodies that came in the mail a couple of weeks ago.  Scrapbooking goodies, you're thinking?  That's right, but not just any scrapbooking goodies, but a personalised "counterfeit kit from ex-forger herself, Jennifer Grace that I won from her Onwards and Upward event just a little while ago!

So I'm hoping that between painting and gardening over the next month or so I'll find a bit of time to play with my August kit . . .

From England with Love. . .

Wednesday, July 31, 2013

July Counterfeit Kit Wrap-up

Well . . . . I think it's some kind of sad new record around here, after being so super-productive with my July Counterfeit Kit while away on holidays, we were back home for over a week before I sat down in my craft room, and it's been more than a week again before I'm finally sitting at the computer with any kind of finished project to show you.

First up, here are the two pages I started while I was away, and finished up at home . . .


The only items I added that weren't from my kit were the letter stickers spelling out "Katelyn" in the page above, the "back to school" Silhouette-cut heading in the page below, and a grey marker with which I edged my elements with on both pages.


The final page I had planned to do with this kit was a double page about a visit to the Wallace and Grommit exhibition earlier this year, but I decided I wanted to print more photos for that one, so I've set those papers aside for now.

Before calling this kit "killed" I wondered what I could do with the left-over bits and pieces, so I went looking for a last-minute challenge I could attempt.  I ended up choosing this sketch from ScrapFriends:


I know many scrappers out there are happy to spend seemingly unlimited amounts of money on every page they create, no matter how small the topic they are scrapping may seem.  Me, on the other hand, well obviously I have a small (compared to some!) budget no matter what the subject matter, and some pages in particular I don't want to spend a lot of money on.
So this page, about a cafe we often visit when we travel north on holidays or to visit family, totally fits the "budget scrapping" bill!


  • Background: the white cardstock you sometimes get in page protectors.
  • Papers: all left over scraps from my Counterfeit Kit
  • Home-made mask and home made mist.
  • DIY "enamel" dots
  • die-cuts also from that same white cardstock, then inked to match the page.
  • heading created using letter stamps
  • star-shaped paper clips: similar to some I have seen on recent Two Peas videos, but have been sitting in my stash forever.
And you know what, I love this page just as much as any I've made without regard to the budget! (This is the cafe we like to stop at for lunch when we head north, but there's a different cafe we like to stop for a devonshire tea on the way home, so now I'm thinking I'll have to take photos of the scones next trip . . .)

How about you?  Do you like to try your hand at a budget page occasionally?  Or can I challenge you to try?  You might be pleasantly surprised at the results!

Sunday, July 14, 2013

What I did with my holiday kit

I'm home from 5 nights away, and happy to say that Flightdeck 301 was fabulous - both the apartment and the Counterfeit Kit of the same name!


I completed 6 pages, and made a start on 2 more.

How did I manage it?  Well, first off, I constructed my Counterfeit Kit a bit differently this time.  After choosing some papers based on the inspiration kit, my second step was to then choose some photos I wanted to scrap with them.


 After adding more papers and cardstock as needed, it was only then that I chose/made embellishments, based on the photos . . . heart speech bubbles to go with a page about meeting my new niece, gears for a page about the Wallace and Gromit "World of Invention" exhibition, sequins for the belly dancing party, etc etc. 

Next up, I was pretty generous with what I packed - like extra cardstock and plenty of stamps and ink.  I was very happy that I packed my little box of small scraps, as well as my 1 inch circle punch and dome stickers for custom DIY "flair".

And finally, every time I felt stuck and tempted to put a page aside, I tried to improvise using what I had.  When I bemoaned the fact that I didn't have any mist to soften the plainness of cardstock, I came back in with some stamping.
When the colour of something wasn't quite right, I adjusted the shade with ink.
And when I didn't have a circle cutter I (gasp!) cut the circles by hand!

(And  scrapbooking on the dining table of an evening in front of the TV sure helped my productivity, too!)


Silhouette owners, did you notice that lovely "wonky circle" cut file that I used on two of these pages?  You can download it for free here!

Sunday, July 7, 2013

July Counterfeit Kit

July Counterfeit Kit by juliemh71
July Counterfeit Kit, a photo by juliemh71 on Flickr.
Just a quick share of my kit this month . . . the school holidays have got away on me, and we're headed on holidays tomorow . . I have named my kit this month after the apartment we'll be staying at next week, "Flightdeck 301".

I'm taking my kit away with me, so for a change, I really need a kit that works on it's own!

I've included plenty of papers, (mostly Crate Pater and Echo Park) a few new alphabets, some stamps and some Tim Holtz "grungeboard" numbers. The photo shows a small selection of the die-cuts I'll be bringing, which includes arrows, cogs, clouds, speech bubbles and more! I've made up a heap of new dimensional dots and also 3 "flair" badges - I don't know if you can tell in the photo, but they're the cutest little critters!

I'll obviously be taking with me trimmer, adhesives, inks etc, and probably some of the "usual suspects" like washi and wood veneers.

Hope you're joining in with the Counterfeit Kit Challenge this month, and I'll see you in about a week, hopefully with some completed pages!

Monday, July 1, 2013

June Counterfeit Kit Wrap-up

First up, how about a quick re-cap of the pages I've already posted:


So that makes five of the possible nine I had originally planned out. I decided to ditch the two pages I didn't have all the photos for, and attempt the two doubles, both of which had seven landscape oriented photos.  I decided to try something a bit different for both of them, making a one-photo "traditional" page, supported by a page using divided page protectors, Project Life-style.

The left side of this first page is inspired by this sketch from Shimelle:


I'm not sure if readers from non-cricketing countries will recognise the play on words in my title for this page. "Howzat" (how's that) is commonly heard on the cricket pitch as an appeal to the umpire, and also the name of the Sports Centre where Angus had his birthday party. 


This one is from Christmas . . . a very rainy afternoon, so we spent it indoors trying out all our Christmas games, books and craft!


A very astute reader might remember that I said both of my doubles had seven photos . . . well they did, but one of the photos mixed in with my Christmas ones was technically a Boxing Day photo, and, I thought, deserved a page all to itself . . . the back of the divided page protector, in fact!


I think the only items from the kit on this page were the journalling cards, slide mounts and kraft butterflies.  Everything else is off-cuts, 6" papers and other items from my stash. I was especially please to remember to use the Echo Park "sewing" themed stickers, as they matched perfectly!


I'm ready to call this kit done, and move onto the next one.  How about you?

Wednesday, June 26, 2013

A few quick pages

After the couple of pages I shared recently, I was finding it pretty hard to get excited about my June Counterfeit Kit.  Number one, I've got a pile of new purchases bought in the EOFY stocktake sales, and Number two, I've had my eye on some of the new sketches Shimelle has posted recently, none of which match the photos I've chosen to go with my kit.

A short break from the kit is in order, don't you think?

I found some photos to go with this sketch:


I went with photos of Angus from when he was just starting Tae Kwondo.  I loved that the four quadrants of coloured paper meant I could represent all the colours of belts - yellow, green, blue and brown, with white and black also appearing on the page.

There are two things from my Counterfeit Kit on this page - wood veneer stars and white thickers.  I confess the title was inspired by the letters I had left on the sheet, that "o" being my last vowel!

I've been meaning for ages to incorporate their training cards onto a page somehow, and I've finally done it - using a circle cutter to cut the logo out of three cards, and using the back side "the 5 principles of Shi-Gan" as my "journalling"


Awesome! Now let's see if I can get back to that kit, perhaps?

 A Back-to-school page for Maddy from this year . . .


I added in the alphabet paper which is from Studio Calico "Classics".  The kraft butterflies were in the kit, and I die-cut some more in the maroon colour, and added buttons to make my dimensional butterflies.  Then washi tape flags, DIY dimensional dots, and done!


 Now it's Rohan's turn:


This page was using the blue cardstock I wasn't quite sure if it matched closely enough to use.  After a bit of misting and splattering I decided I was happy with it.  All the papers on the page are from the same sheet, which has borders on one side and that geometric pattern on the other.  I decided to make a feature of the numbers on two of the strips, and incorporate the direction of the chevron strip in my design also.

(Journalling still to come)


For some reason, I didn't print out enough photos to do this year's "back to school" pages for all the albums, so let's move on to extreme sports, shall we?
This page uses a bit of a fall-back of mine, three portrait photos lined up in the middle of the page.


This one doesn't have journalling yet, either . . . I need to do a bit of research on the details of the event first. At this stage, I don't plan to add any further embellishment beyond the splatters - but I reserve the right to change my mind!
And yes, another title inspired by my left-over thickers, because if you can't use a left over "X" when you're talking about extreme sports, when can you, really?

Saturday, June 22, 2013

Finally starting on my June Counterfeit Kit.

So . . . what's been happening around here lately?  Some working, some sickness, some sewing . . . some more working, some more sickness . . . even the odd load of washing or two!  But finally I've made it into my craft room to play with my Counterfeit Kit!

Way, way back (or that's how it feels!) after I first made my Kit up, I decided to pull out some photos and keep matching photos to papers and cardstock until I'd allocated every sheet in the kit . . .


If I manage to get all those pages done, that would be 7 singles and 2 double page layouts.  . . . and I'll probably be adding a lot more product!  So that's the papers sorted, but my die-cuts don't match so well (note to self: when creating next month's kit: choose papers, then photos, then embellishments!)

OK, enough chattering, where are the pages already?!


A couple of pages for the neglected middle child, perhaps?


One covering the last day of school last year, when he said goodbye (at least in terms of sharing a classroom with them) to some of his best school friends, who have headed off to high school this year.


And one with photos from this year's swimming carnival.  We're not a very sporty family, and neither do we think leadership is one of our greatest qualities, so we were both surprised and delighted that Angus was voted House Captain this year. I love to call him "Captain Angus" at every opportunity.   He loves wearing his badge and, being captain of the red house, that red badge sure does stand out on his uniform!


June was the first kit in a few months that I didn't include DIY "flair" and "dimensional dots", so you can guess what I reached for on both pages, can't you!  Other additions to the kit include thin paper strips and extra washi on the first one, and 6" papers and red diecuts left over from another kit on the second one.

Also some new stamps from a recent spend.  True story: I was a bit annoyed that I hadn't thought to put my stamping on the "Hello holidays" page before I adhered my photos to the page, as there was a bit of a gap where the stamps didn't reach.  I figured I'd make it OK with layering and washi tape.  When I came back later, I realised, OH! the photos actually weren't adhered to the page at all! Ooops! Oh well, like I said, layering and washi tape!